
Keeping your BMW clean is super important for its looks and how well it runs. Washing your car regularly not only makes it shine but also keeps the paint and finish from getting damaged. As a proud BMW owner, you want your ride to always look its best.
Just follow these steps and you’ll notice fewer swirl marks, a deeper shine, and no more wondering if you should sell it. The key is using the right order and having the right tools so your BMW looks like it just came out of the showroom instead of going through a rough patch. So let’s get started!
The five most important rules
- Don’t use dish soap. It strips protective wax and leaves micro-swirls. Use a car shampoo.
- Wash top → down, rinse often. Dirt falls downward; keep your mitt clean.
- Two-bucket + grit guard prevents swirls. Seriously—this little trick saves your paint.
- Clean wheels & brakes first (iron remover). Brake dust will scratch if it gets on the mitt.
- Clay only if paint feels gritty. Don’t clay a perfectly clean, smooth panel!
Those five rules cover 90% of the damage-prevention and shine math. Now to the step-by-step:
The Importance of Regular Car Wash for Your BMW
Washing your car regularly is important for several reasons. First off it gets rid of dirt dust and all the junk that piles up on your BMW’s surface. If you leave that stuff on there it can lead to scratches and swirl marks. Regular washes also help clear away bird poop tree sap and other gunk that can mess up the paint if it sits too long.
If you skip washing your car you might notice some bad effects on how it looks and even how it runs if we consider the regular cleaning of your wheels. Over time dirt and grime can layer up making your BMW look pretty dull and dirty. This not only takes away from its overall look but it can also lower how much you could sell it for later. Plus if you forget to wash your car you could end up with corrosive stuff like road salt and brake dust building up which can really mess up the paint and finish.
Everything you’ll use: Choosing the Right Products
Here’s a handy list of tools for giving your BMW a good wash. You don’t need to grab everything right away, though. If you think your car doesn’t need something now, feel free to skip it. You can always pick it up later for future washes:
| Item | Recommended Products | Why You Need It |
|---|---|---|
| Car Shampoo | Meguiar’s Gold Class Car Wash Shampoo & Conditioner | Combine cleaning & conditioning into one step |
| Alternative Soap | Chemical Guys Mr. Pink Car Wash Soap | Great suds, pH-balanced, foam cannon friendly |
| Wash Mitt | Rag Company / Chemical Guys chenille microfiber wash mitts | Soft, high-pile |
| Iron Remover / Decontaminant | CARPRO IronX Iron Remover | Safe, pH-balanced, dissolves brake dust and rail dust |
| Wheel Cleaner (color changing) | SONAX Xtreme Wheel Cleaner / SONAX Beast Wheel Cleaner | Tough on baked-on dust but safe on finishes. |
| Two-bucket + grit guard | Adam’s Polishes Car Wash Bucket | Holds dirt at the bottom, keeps it away from your wash mitt. |
| High-Pressure Washing Machine | Kärcher Pressure Washer K5 | super simple to use with a water-cooled brushless motor |
| High-Pressure Foam Sprayer | MTM Hydro PF22 Foam Cannon | Attaches to pressure washer and help prevents spilling. |
| Disc Sponge / Applicator | Chemical Guys Hex-Logic applicator pads | Soft, perfect for wax/sealant |
| Clay Bar Kit | Auto Magic Clay Magic | Gets rid of tree sap mist and can last for up to 20 uses |
| Polishing Pads / Dual-Action Polisher | Chemical Guys pads and DA polisher options | Perfect for both dual-action and rotary machines. |
| Quick Detailer / Drying aid | Adam’s Detail Spray / Meguiar’s Quik Detailer | Great as drying aid and for spot touchups |
| Wax / Sealant | Collinite No. 845 Insulator Wax / Griot’s Garage Best of Show Wax | Collinite No. 845 (long-lasting protection), deep carnauba glow |
| Drying towels | The Rag Company – Eagle Edgeless 600 | Absorbs water efficiently without scratching. |
| Interior Microfiber | The Rag Company – Edgeless 365 Microfiber Towels (10-Pack) | Professional Microfiber Polishing Towel |
| Detailing Brushes | Detail Factory – Synthetic Detailing Brush | Tough against chemicals and won’t scratch, rot, or rust. |
| Leather Cleaner | Meguiar’s Gold Class Leather Cleaner & Conditioner | All-in-one leather cleaner and conditioner with UV protection |
| Tire Dresser | The Aero Cosmetics Tire Dressing | Black matte finish looks great and restores and protects tires. |
| Stainless Steel Cleaner | Bar Keepers Friend | Bleach-free powdered stainless steel cleaner |
| Stainless Steel Polish | Mothers Mag & Aluminum Polish | Simple to use and lasts a long time on all types of metal. |
| Glass Cleaner | Premium Glass Cleaner and Window Spray | Streak-free, crystal-clear results. |
Wash Your BMW Like A Pro (Step-By-Step)
First: Set Up The Scene…
Wash your car in the shade — morning or late afternoon is best — because cooler, shaded surfaces prevent soap and water from drying too fast and etching the clearcoat. Direct sun raises panel temperatures, accelerating chemical reactions that leave streaks, water spots and micro–etching from gritty runoff. Park where tree shade or a canopy blocks direct sun and keep the car level; avoid blacktop at midday because reflected heat will still bake your rinse. If you can’t find shade, create it with a pop-up canopy or even a large umbrella to slow drying. Shade also protects trim and plastics from rapid thermal cycling during washing, so dressings and sealants cure more evenly.
Bottom line: shade isn’t optional — it’s the simplest paint-protection hack that reduces spots and improves final finish.
Quick tip: Check the surface by hand: if the paint feels warm to the touch, wait or move the car — cleaning a hot panel increases swirl risk. For precision, a handheld infrared thermometer tells you whether panels are cool enough; pros aim for a surface noticeably below ambient peak.
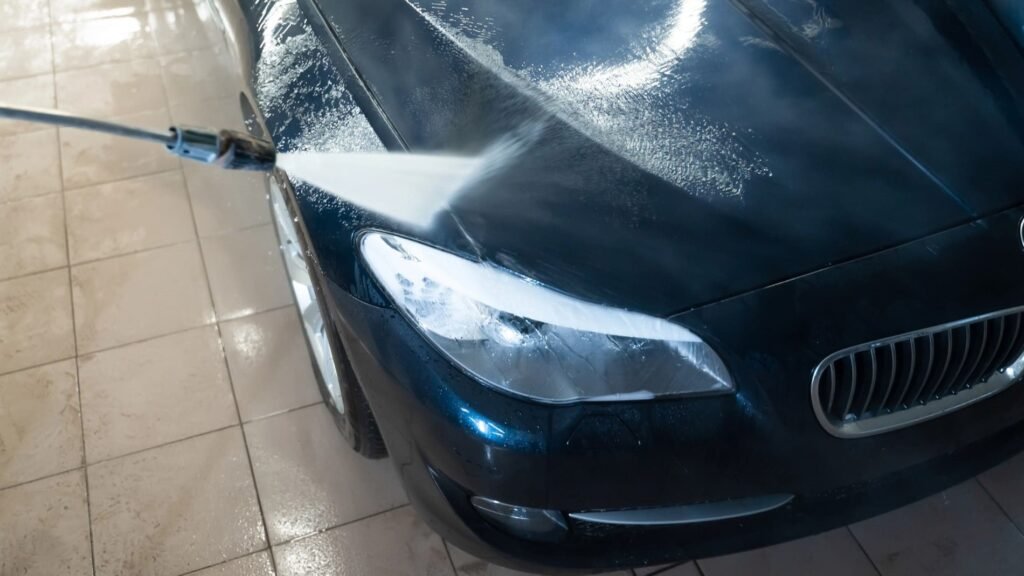
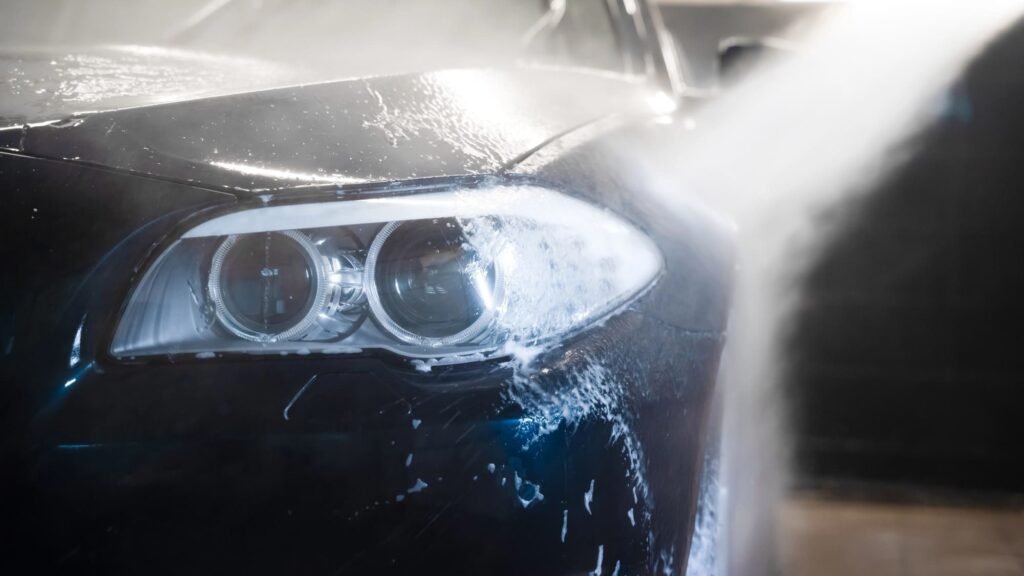
Step 1 — Rinse (Pressure Rinse If You Have One)
Start top → down: remove loose grit first so you won’t grind it into the paint when you wash. If you have a consumer pressure washer (e.g., Karcher K-class style units), use a wide-fan nozzle (25°–40°) and keep the wand moving — never hold the jet on one spot. Hold the nozzle roughly 12–24 inches (30–60 cm) from the panel; closer risks clearcoat damage, farther loses cleaning force. Aim the spray slightly across seams and trim to lift trapped muck out of gaps.
Technique tips pros use:
- Use overlapping sweeps and work roof → pillars → hood → trunk → lower panels so loosened grime rinses downhill.
- Hit wheel wells and lower rocker panels from below and behind to eject brake dust and road grime; a short burst into the undercarriage clears salt and grit.
- Avoid 0° (pencil) or turbo nozzles and skip high pressure on brittle trim, soft tops, antennas, and weatherstrips. Keep the beam angled, not perpendicular, on seams and decals.
- If the car is very dirty, do a quick foaming pre-soak with a low-pressure foam lance before the pressure rinse — it softens tar and bugs for easier removal.
Safety & practical notes:
- Use a GFCI outlet and clean water supply. Wear eye protection for wheel-well work. If you don’t own a pressure washer, a garden hose with a wide-fan nozzle and steady flow will do the job—just expect to spend a bit longer.
Why this matters: a proper rinse strips abrasive particles and softens grime, cutting wash time and dramatically reducing swirl risk during the mitt stage.
Quick tip: If your wheels are really dirty, wash those first. Otherwise, brake dust can drip onto your freshly cleaned panels.
Step 2 — Decontaminate (Iron Fallout / Tar)
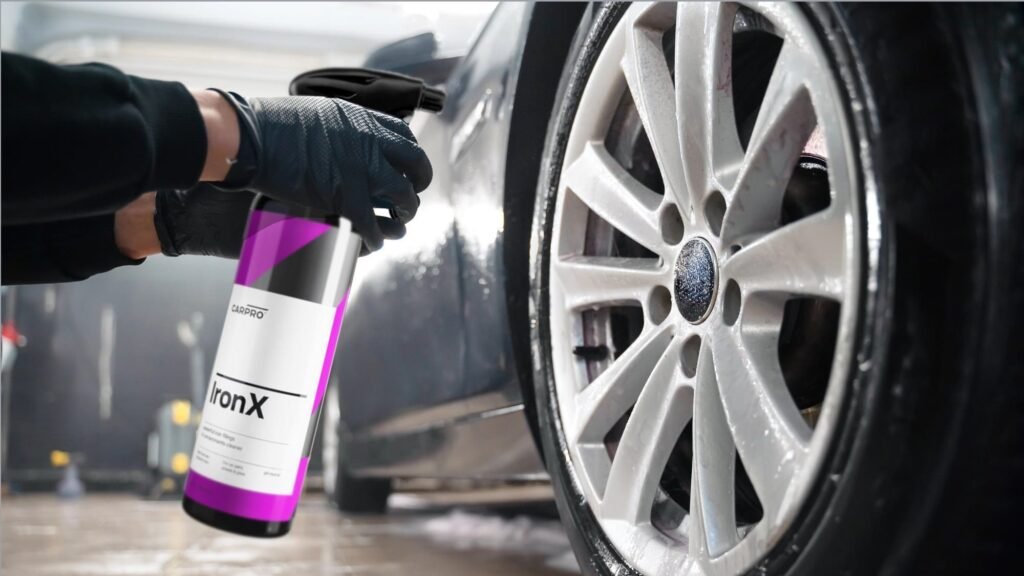
After the rinse, kill embedded contamination before you touch the paint. Brake dust contains microscopic iron particles that chemically bond to clearcoat and act like sandpaper when you scrub — and road tar is stubborn glue that won’t lift with shampoo alone. Start with the wheels: spray a pH-balanced iron remover (e.g., CarPro IronX or similar) liberally into wheel wells, calipers and barrels; you’ll see a purple/red reaction as iron dissolves. Agitate wheels with a dedicated wheel brush, let the product dwell per label (usually 2–5 minutes), then rinse thoroughly.
Next, treat painted panels. Work panel by panel: spray the iron remover, wait until the color-change reaction slows (don’t let it dry), then flush with low-pressure water. For heavy tar or asphalt spots, use a targeted tar remover or citrus-based solvent on the spot, rub gently with a microfiber or detailing sponge, and rinse. If paint has a cured tar blob, a slow, focused solvent application loosens it without aggressive rubbing.
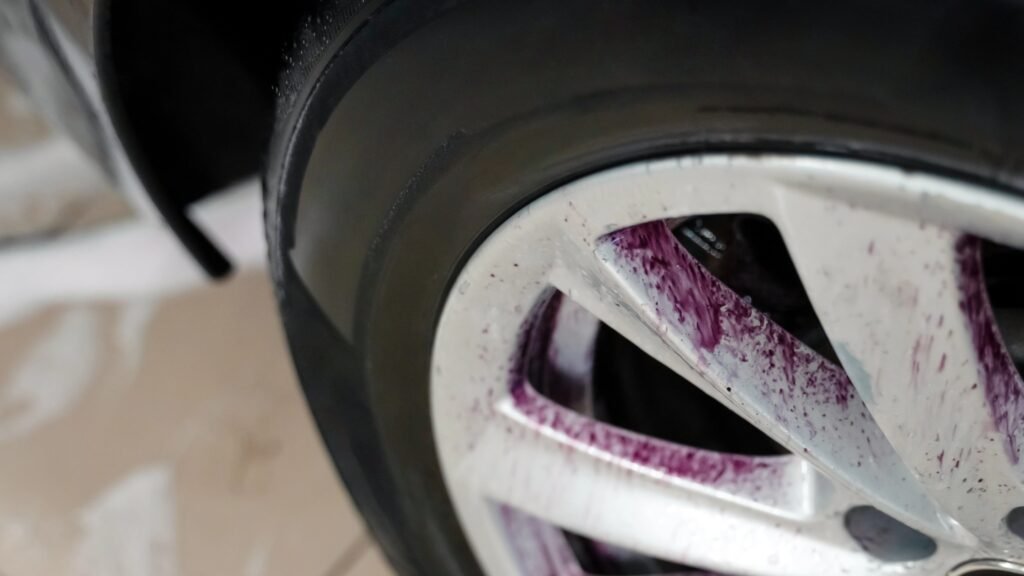
When you spray a decontaminant on your wheels let it sit for a bit. You’ll see it change to purple or red as it dissolves the iron particles. Make sure to rinse it off really well.
Pro tips & precautions:
- Don gloves and eye protection; work in shade and on cool panels.
- Don’t mix iron remover with acidic wheel cleaners or strong solvents.
- Check product compatibility if you have a ceramic coating — most iron removers are safe, but follow manufacturer guidance.
- Finish this step with a full rinse. If residue remains, follow with a clay or clay-alternative to restore slickness before washing.
Quick tip: Make sure the surface is cool and not in the sun. If it’s too hot, soap and water can dry too fast, which can cause water spots, streaks, and even mess up the paint.
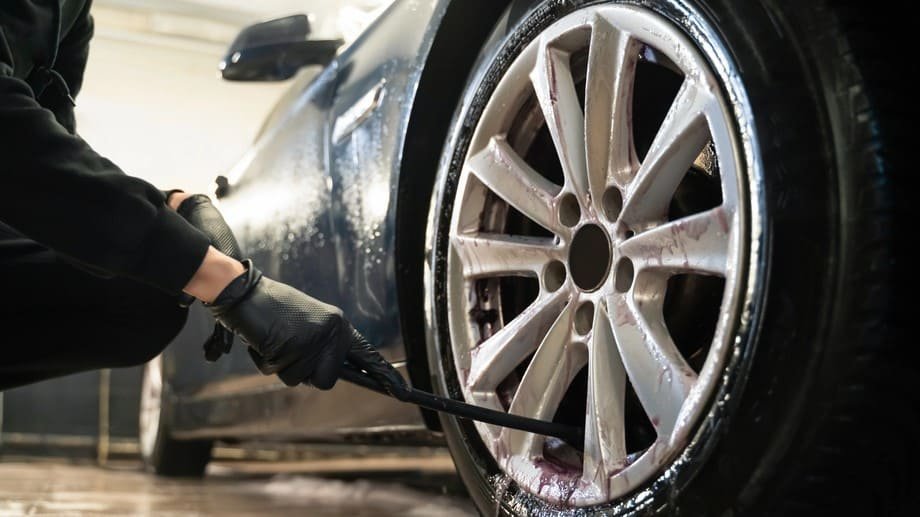
Step 3 — Wheels & Wheel Wells
Wheels deserve their own ritual. Start with cool surfaces and plenty of water: spraying first loosens road grime and eases agitation. Use a dedicated wheel cleaner matched to the finish — pH-neutral, non-acid cleaners for clear-coated/painted alloys; stronger iron-dissolving formulas (SONAX Xtreme, Iron X variants) for baked-on brake dust and stubborn grime — but don’t let aggressive acids sit on delicate finishes. Spray liberally into the wheel face, barrels and calipers and watch the color-change reaction do the heavy lifting.
Tools matter: use a soft wheel brush for faces, a narrow wheel-barrel brush to reach the inner barrel, a small boar-hair or nylon detail brush for lug-nut wells, and a long-handled wheel-well brush for the arches. Agitate gently — short, decisive strokes — then flush thoroughly with a wide-fan rinse. For painted calipers or coated wheels, avoid steel-wire brushes and high-pressure jabs close up; angle the spray and keep 12–18 inches distance.
Tires and wells: hit rubber with a separate tire cleaner and a stiff brush to remove old dressing and embedded grime; rinse well. Clean wheel wells and splash guards with an APC or degreaser (diluted per label) and a scrub brush, then rinse underneath to remove trapped salt/grit. Dry wheels with a microfiber or let them air-dry before applying wheel sealant or ceramic wheel coating — that layer cuts future brake-dust bonding and slashes cleanup time.
Quick tip: Keep one set of brushes and towels only for wheels — brake dust is the enemy of finish when it migrates to paint.
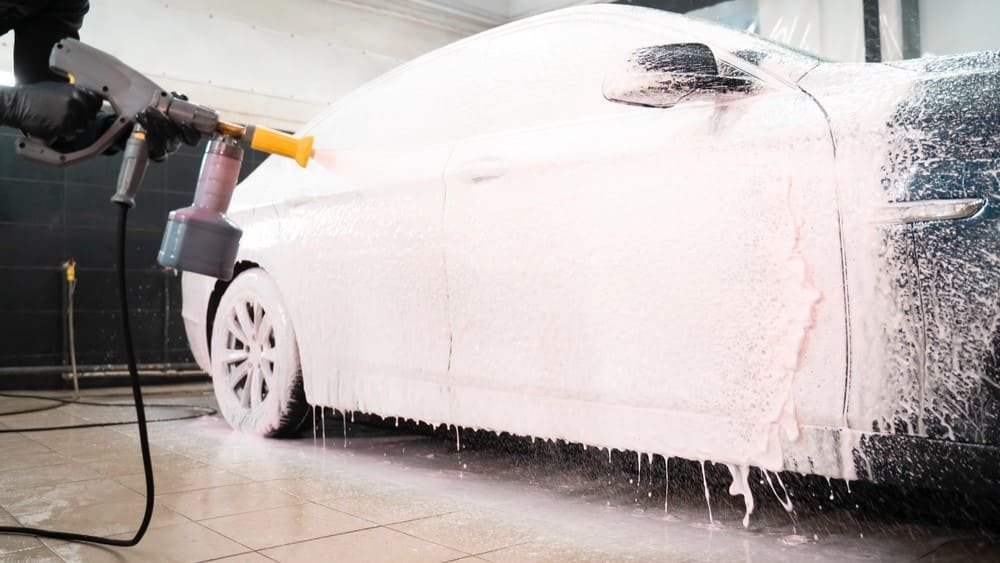
Step 4 — Pressure Washer & The Two-Bucket Wash
Hook up your foam cannon (MTM Hydro-style) to the pressure washer (Karcher K5 or similar), and use a proper car shampoo — pH-neutral soaps like Mr. Pink, Meguiar’s Gold Class or similar. Follow the soap maker’s dilution but a practical foam-cannon range is roughly 1:10 to 1:30 (stronger for very dirty cars, weaker for routine maintenance). Too concentrated = excessive suds, harder rinsing; too weak = thin foam that won’t lubricate the mitt. Fill the cannon, spray top-to-bottom, and let the foam dwell 1–3 minutes — just long enough to loosen grime but never let it dry on the panels.
If you don’t have a foam cannon, a low-pressure foam lance or generous dilution in a spray bottle still helps — the goal is to lift grit off the clearcoat before contact.
Both Meguiar’s Gold Class and Chemical Guys Mr. Pink are safe choices that won’t mess with your pH levels. They’ve gotten great reviews for their smooth lubrication that helps keep swirls at bay. A recent roundup by Road & Track even gives a shoutout to both as top performers.
Quick tip: check out the MTM Hydro foam cannon kit. It’s got spray gun adapters too, which is pretty cool!
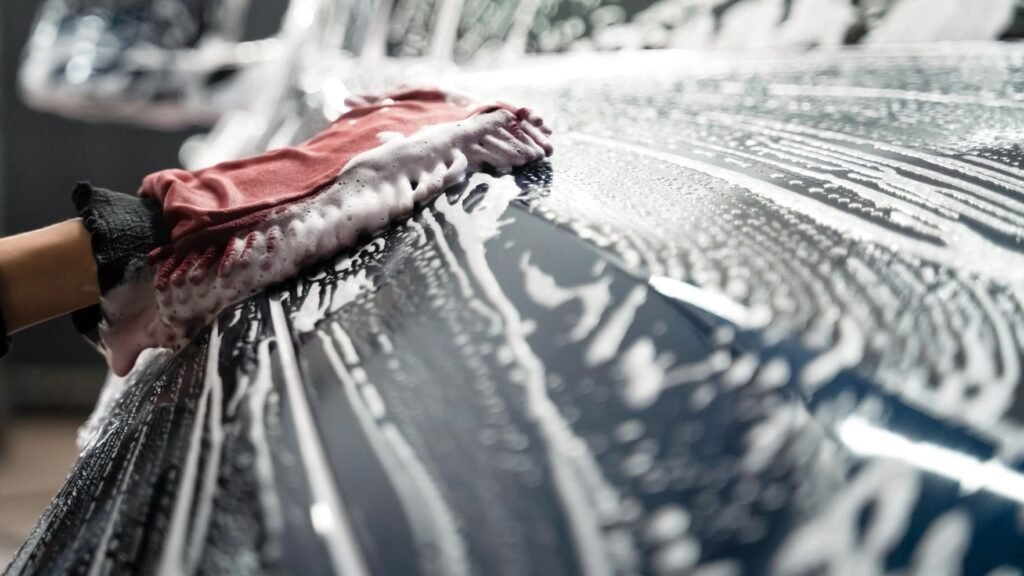
After foaming, set up two 5-gallon buckets with grit guards: one with soap + mitt, one as a rinse. Use a soft, plush chenille or waffle-weave microfiber mitt (Rag Company, Chemical Guys, etc.), and wash one panel at a time. Dip the mitt into the soap bucket, wash a panel in straight-line strokes (not circles) with light, even pressure, then rinse the mitt seed-by-seed in the clean bucket by rubbing it against the grit guard to dislodge trapped particles before reloading with soap.
Pro tips that pros swear by:
- Keep the pressure washer wand moving and only use its force for the initial rinse/foam — don’t use high-pressure spray during mitt washing.
- Flip and fold the mitt frequently so you’re always using a clean face.
- Use a separate, dedicated mitt/towel for lower rocker panels and the lower half of the car — these areas carry the worst grit.
- Keep buckets shaded and off hot pavement so suds stay cool longer.
Why this step matters: foam + the two-bucket method dramatically reduces abrasive contact, turning a risky scrub into a gentle, controlled cleaning that slashes swirl marks and preserves your paint.
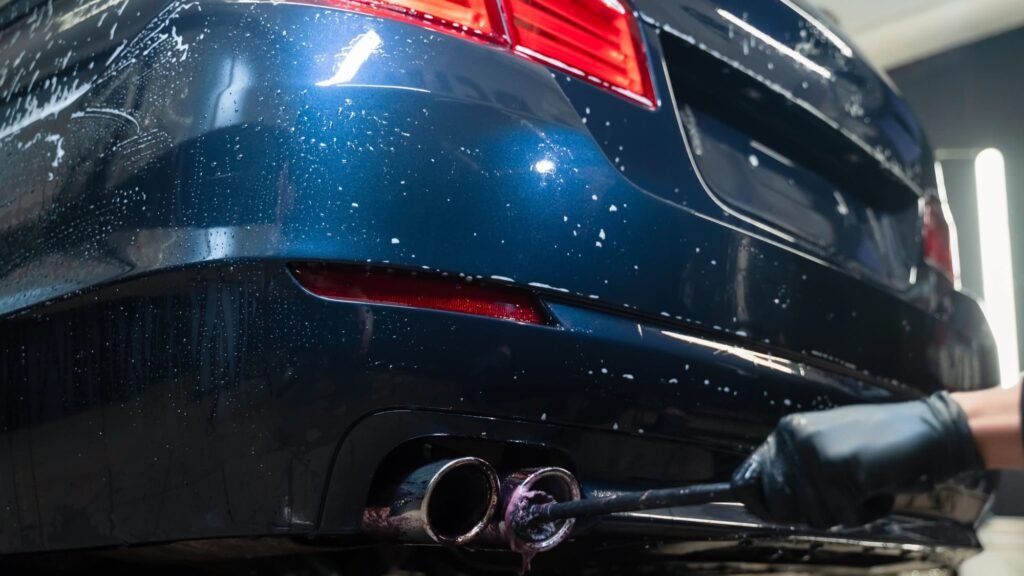
Step 5 — Exhaust Tips Cleaning
Leave the pipe to cool completely. Heat + cleaners = burns — let it sit or wear heat-resistant gloves if you must work warm. Tape off nearby paint/bumper seams with painter’s tape to avoid splash damage.
- Protect: Finish with a thin coat of high-temp metal sealant or a metal polish that leaves a durable film (or a dedicated ceramic metal coating) to slow future carbon bonding and make the next clean easier.
- Degrease first: Spray a fast-acting degreaser into the inner barrel and onto the outside lip; let it soak 1–2 minutes. Agitate inside with a dedicated brass brush or a narrow wheel-brush — brass removes carbon without gouging stainless or chrome. Rinse.
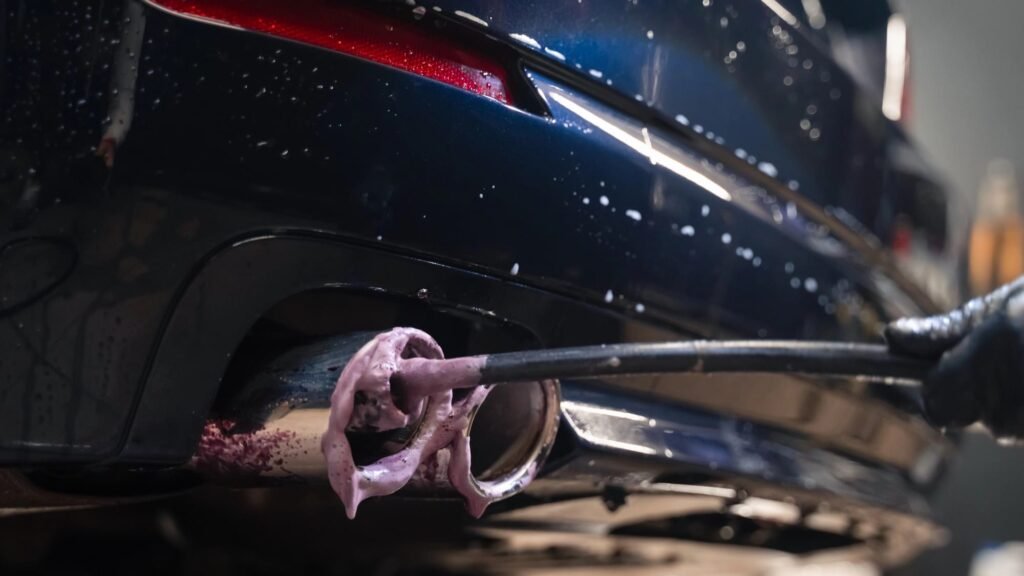
- Tackle inside carbon: For stubborn soot, repeat degrease and use a slightly stiffer brass brush or a 0000-grade stainless wool wrapped on a stick. Keep the motion gentle and flush debris frequently so grit doesn’t re-abrade the metal.
- Remove surface deposits: For outer chrome/stainless: use a non-acid metal polish (Mothers, Autosol or Meguiar’s metal polish). Apply with a microfiber or a polishing pad; for heavy staining a DA polisher with a soft wool pad speeds the job — but use low speed and caution. Avoid acidic wheel cleaners or oven cleaners on coated/black tips.
- Porcelain/black/anodized tips: skip abrasives. Clean with pH-neutral soap, a soft brush, and a mild all-purpose cleaner; finish with a silicone-free protectant designed for coated trims.
- Rinse & dry: Flush thoroughly, dry with a clean microfiber, and inspect. If small rust spots remain, use a fine polish or 0000 wool gently, then polish.
Pro tip: steer clear of any abrasives on black or ceramic-coated tips. And avoid using a pressure washer on them. water deep into the muffler; quick interior scrubs monthly, full polish + protect every 3–6 months.
Safety & pro tips
- Wear gloves and eye protection; work in the shade.
- Don’t use steel wire brushes on chrome — they scratch.
- Test any abrasive on an inconspicuous area first.
- Do this step last so wheel and body grime won’t soil the freshly polished metal.
Do it right and those tiny tips will punch well above their weight in the finished look.
Step 6 — Rinse, Inspect, Repeat If Necessary
After you’ve washed every panel, give the car a thorough final rinse from top down using a wide-fan spray. Aim to flush foam, loosened grime and any residual cleaners out of seams and panel gaps — a steady, overlapping sweep ensures no suds are left to dry into spots. Work methodically so the entire surface is wet and free of soap.
Now the covert test: dry your hands and lightly glide the flat of your fingertips palm-side down over each panel (roof, hood, doors, fenders). You’re feeling for grit — not polish. If the surface feels glass-smooth, great; if it drags or you feel prickle-like particles, that paint still has embedded contamination.
If you detect grit, don’t push forward to drying/polish. Instead, repeat targeted decontamination: spot-spray an iron-remover on the offending area, rinse it off, and recheck. For stubborn spots that the iron remover doesn’t clear, use a clay-bar procedure (or a dedicated tar solvent) on that panel only — then rinse again. After any additional decon work, re-inspect with the fingertip test until the panel feels uniformly slick.
Why this matters: skipping the check risks sealing abrasive particles under a sealant or wax, which causes swirls and permanent micro-marring. Only when every panel passes the fingertip test should you move on to drying and protection.
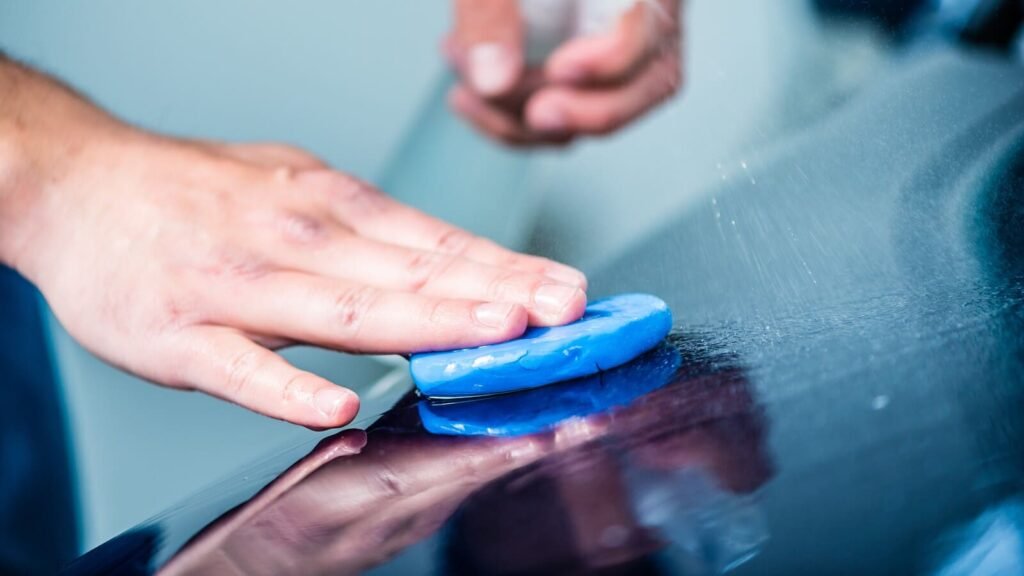
Step 7 — Clay Bar (Only If Paint Still Feels Rough)
When your fingertip test shows roughness, clay is the tool that removes bonded rail dust, industrial fallout and tar that shampoo won’t touch. Work in the shade with cool panels. Use a dedicated clay bar, clay mitt or a clay towel and a generous amount of lube (Meguiar’s Detailer, Adams Clay Lube, or a paint-safe quick detailer). Break the clay into a palm-sized piece and knead it until pliable, or use a fresh face on a clay mitt.
Technique: spray lots of lube on a small panel, lay the clay flat, and glide it slowly with light, even pressure in straight lines. Let the clay skim the surface — no scrubbing. When the clay picks up grit and feels rough, fold it to expose a clean surface or replace it; don’t keep rubbing with dirty clay. Work panel-by-panel and rinse any residue. If you’re doing heavy contamination, choose the clay grade appropriately (fine for maintenance, medium/heavy for bonded fallout) — but start gentle and step up only if needed.
Safety notes: don’t clay on hot panels, avoid clay on severely flaking clearcoat, and if your car has a ceramic coating, use a clay alternative (clay mitt or synthetic nano-surface cleaner) recommended by the coating maker. After claying, recheck the fingertip test — the paint should feel glass-smooth and ready for polishing or sealing.
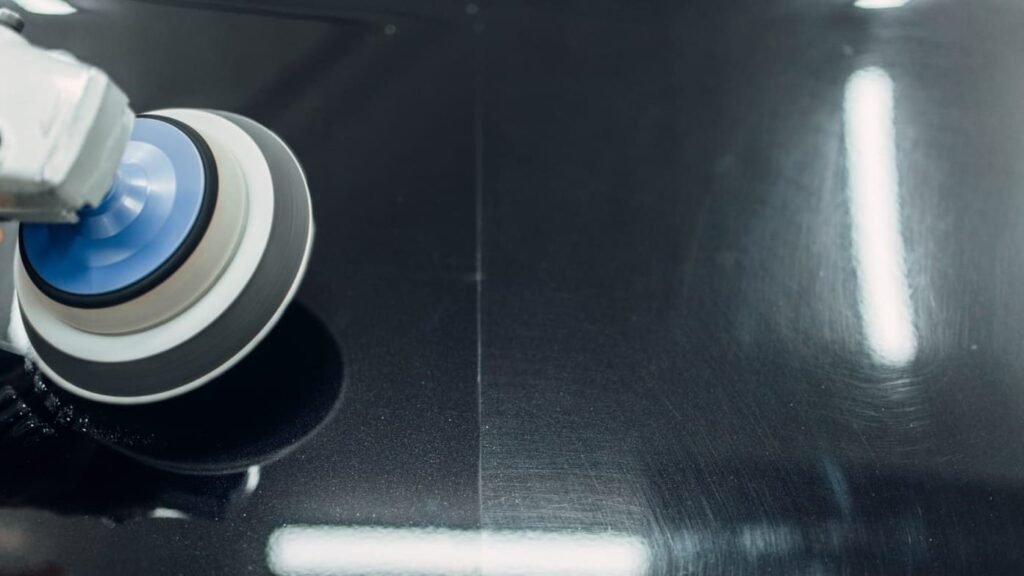
Step 8 — Polish (Optional, For Real Correction)
Polishing removes light swirls and faint scratches left after claying. If you want a showroom finish (especially on dark cars), polishing is the step that actually refines the clearcoat — but treat it like surgery: less pressure, more control.
Hand vs. machine
- By hand: use a fine polish and a soft foam or microfiber applicator. Good for spot work or very light haze. Work small areas, rub in straight lines, then buff off with a clean microfiber.
- Dual-action (DA) polisher: the safest machine option for beginners. Fit a low-convoluted foam polishing pad with a fine polish (polish ≠ compound). Start with the polisher on a low speed, spread product with the pad off the spinning head, then work at 3–4 (on a 1–6 scale), overlapping passes for each 12″x12″ area. Keep the pad flat, move steadily, and don’t dwell — heat and pressure remove clearcoat quickly.

Polishing foam discs that come with a handle are super handy even if they might take a bit longer. They’re great for applying sealants by hand or for using with a machine and a backing.
You can check out similar options here.
Pro technique & safety
- Always work on cool panels in shade and keep a clean pad (flip or replace as it loads).
- Use slow, overlapping passes and inspect often; wipe residues with isopropyl alcohol on a microfiber to check real correction.
- If heavy defects remain, step up to a medium polish or cut/polish combo — but test first on an inconspicuous patch.
- Avoid rotary polishers unless you know what you’re doing (they cut fast and burn clearcoat).
- Finish with a fine finishing polish or glaze before sealing or waxing.
How often? For most daily drivers, one light machine polish every 12–24 months is enough. If you polish aggressively, protect the result immediately with a sealant or ceramic coating.
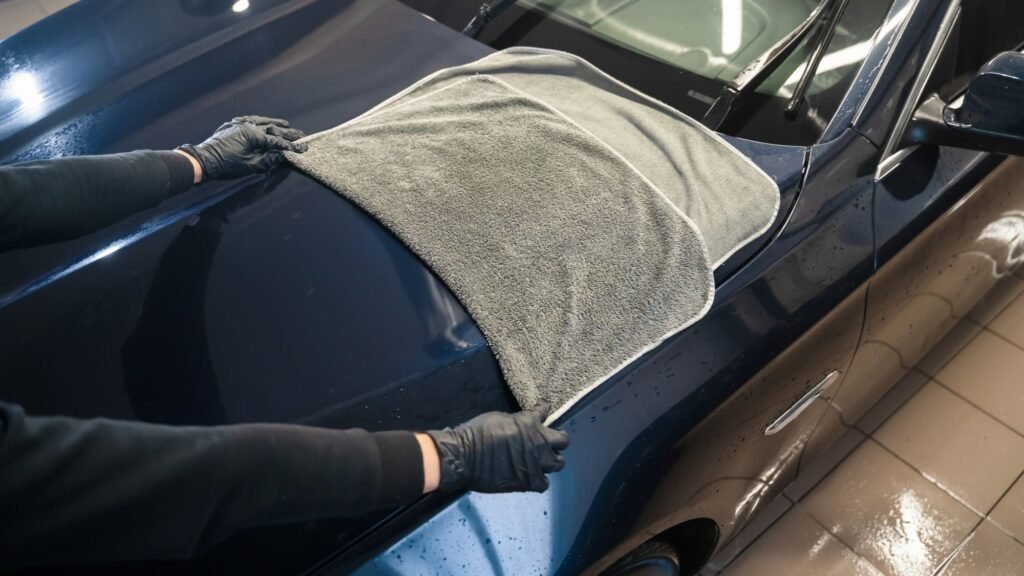
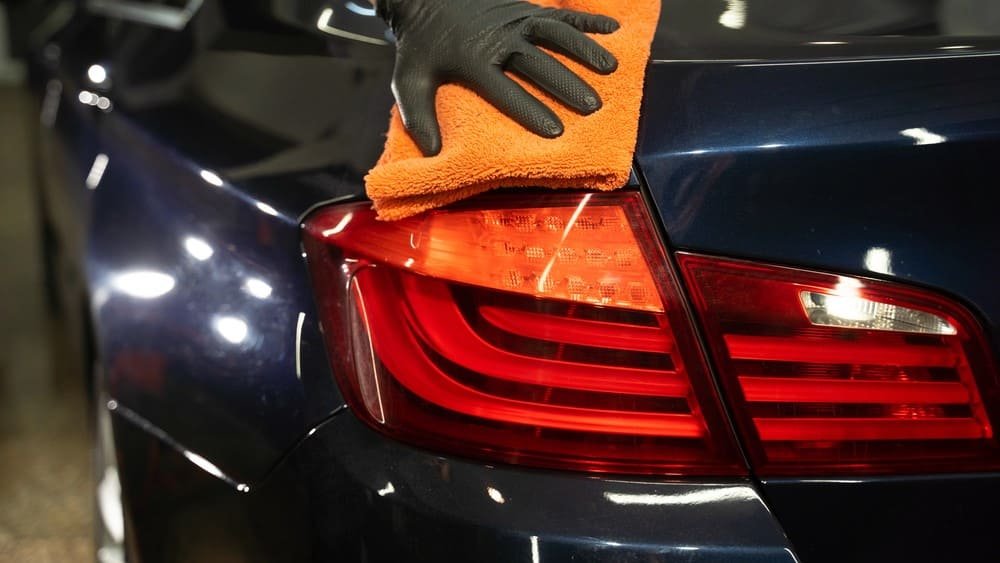
Step 9 — Dry With Big Microfiber Towels
Grab a large, high-pile microfiber drying towels (waffle or plush, 800–1200 GSM) — think The Rag Company Liquid8r or Eagle Edgeless 600 — because size and absorbency cut the number of passes and reduce contact. Work top → down while panels are still wet: lay the towel flat, pat to absorb, then drag once across the panel with light, even pressure. Don’t scrub or spin the towel in circles — that’s how swirls start.
Tips that make this foolproof:
- Fold smart: keep the towel folded into 4–6 layers so you always use a clean face; refold frequently to expose dry microfiber.
- Swap when saturated: when a towel no longer soaks up quickly, replace it. Don’t wring a dirty towel into your wash bucket — you’ll reapply contaminants.
- Use multiple towels: one large towel per roof/hood/trunk, a second for doors and fenders, and a dedicated glass towel. Glass deserves a separate, low-lint microfiber.
- Edge and seam care: blot seams and badges first (water pools there), then glide the towel away from edges to finish.
- Finish with light passes: once panels are mostly dry, give a final gentle one-way wipe to remove streaks and leave a uniform surface for sealant or wax.
Big towels = fewer passes, less friction, and a cleaner finish. Treat them well (wash separately, low heat, no fabric softener) and they’ll protect your paint for years.
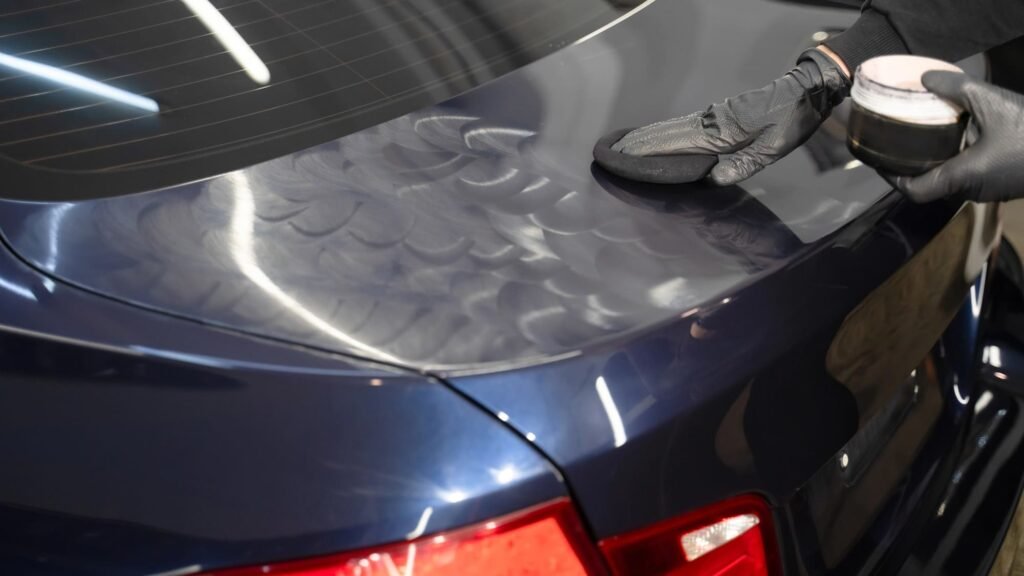
Step 10 — Protect: Wax, Sealant, or Ceramic Coating
Pick your protection based on how often you want to touch it up:
- Wax (like carnauba or blends): gives your car a nice depth and warm color (check out Griot’s Best of Show). It doesn’t last super long so you’ll want to reapply every 2–3 months.
- Sealant (synthetic): lasts longer and super easy to use. Just reapply every 4–6 months.
- Hybrid / long-life (like Collinite 845): durable and creates nice beads of water. It’s a solid choice for anyone who wants strong protection that’s easy to put on.
- Professional ceramic coating: gives you multi-year protection but you’ve got to prep it perfectly (like using clay and polish). Usually, it’s best done by a pro unless you’re up for learning how to do it yourself.
Apply thin coats of wax or sealant in the shade using a disc sponge or Hex-Logic pad. Then gently wipe it off with a clean microfiber towel that doesn’t have any edges.

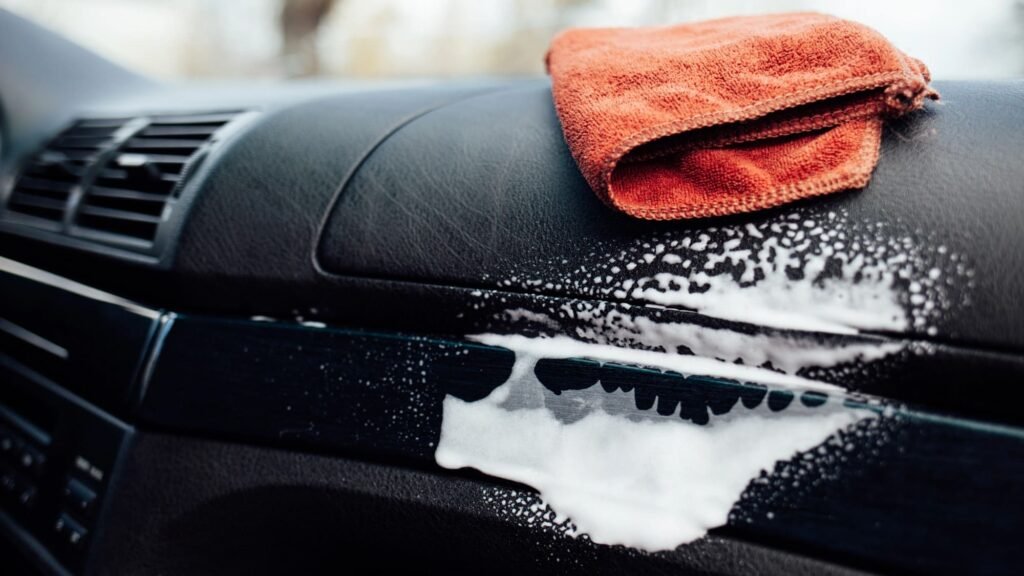
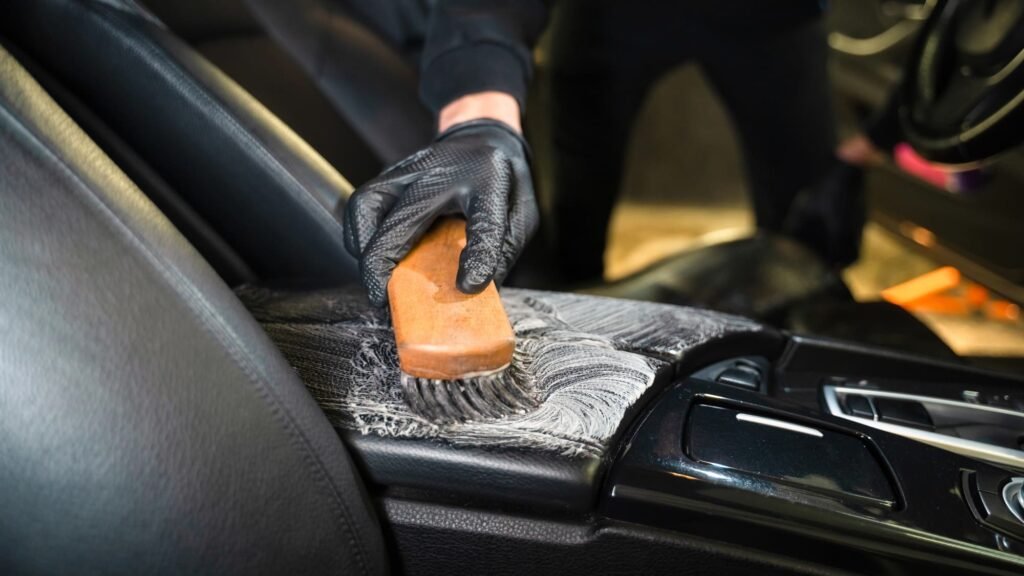
Step 11 — Interior: Vacuum, Brush, Wipe
Clean, conditioned seats and trim look newer, feel nicer, and resist cracking and fading. Do this after vacuuming and before final dashboard/detail spray.
- Start by vacuuming the carpets and seats. Grab an interior brush set like the Detail Factory Detailing Brush to really get into the dirt in the vents and seams.
- Next, wipe down the plastics and leather using a special interior microfiber cloth and cleaner. For the leather, a horse-hair brush and some conditioner can help if it needs a little extra care.
- For suede/Alcantara make sure the dry is completely brush.
Step 12 — Tires & Trim
Freshen up your tires and interior with a water-based or silicone-free dressing to get that natural look without the greasy feel. Tire dressing can make your tires shine while also protecting them from UV rays and dirt.
Don’t go overboard with conditioning leather. A light treatment every few months works way better than a big application less often. Also steer clear of silicone-heavy products on your dashboard where glare might be a problem.
- Spray or apply your leather/vinyl cleaner to an applicator pad or microfiber; agitate seams and crevices gently with an interior brush. Wipe away soil with a clean microfiber. Repeat if heavily soiled.
- For leather, apply a thin layer of leather conditioner and work it in with a Hex-Logic pad or soft cloth. For vinyl/plastic trim, apply a small amount of protectant with a pad.
- After dwell time (per product), buff off excess with a clean microfiber until an even, non-greasy finish remains, then open doors to air out and re-inspect for streaks or darkening; re-buff if needed.
When it comes to your tires, skip the wax or sealant since those are just for your car’s paint.
Step 13 — Final Wipe And Maintenance Tips
With the car clean and dry, finish panel-by-panel using a spray detailer (Adams Detail Spray, Meguiar’s Quik Detailer, or P&S Bead Maker) to remove micro-spots, lift dust, and boost gloss. Work one panel at a time: mist a light, even spray 8–12 inches from the surface, wipe with a clean, plush microfiber (folded to a fresh face), then buff with a second dry microfiber for a streak-free shine. For glass, use a low-lint glass towel and a glass-safe spray — avoid using the paint towel on glass to prevent transfer marks.
If you spot mineral water rings or light etching, try a dedicated water-spot remover or a 1:1 mix of distilled white vinegar and deionized water applied sparingly, wiped immediately, and rinsed — test on an inconspicuous area first. Never scrub; use gentle, repeating sprays and clean faces to avoid micro-marring.
Maintenance checklist (do these regularly):
- Apply a quick spray-wax or ceramic booster every 4–8 weeks to extend protection between full sealant jobs.
- Keep an extra set of towels for final buffing and wash them separately (no fabric softener, low heat).
- Park in shade or use a car cover to reduce UV fade and bird-droppings.
- Address chips, tar or tree sap promptly — they accelerate corrosion and staining.
- Wipe dust off lightly between washes with a dedicated quick-detail towel rather than re-washing.

Final pro tip: the final wipe isn’t just cosmetic — it’s your last chance to catch trouble (spots, drips, missed bugs) and lock in protection. Do it slowly; the payoff is a showroom finish that lasts.
Which is better, hand wash or automatic wash?
Bucket hand-wash, pressure-washer-assisted hand-wash, and automatic touchless washes each solve the same problem — remove dirt — but they do it very differently. The two-bucket hand wash (mitt + grit guard) gives the most control and is safest for paint when done carefully. Adding a pressure washer + foam cannon speeds rinsing and loosens brake dust, but you must use a wide fan nozzle and keep distance to avoid blasting seals or trim. Automatic touchless washes minimize contact-scratch risk and are fast, but they rely on stronger chemicals and rarely match the deep-clean power of a careful hand wash for baked-on grime.
Verdict (when to pick each)
- Bucket hand-wash: Best for paint care and finish preservation. Use when you want maximum protection and detail-level cleanliness.
- Pressure-washer + hand-wash: Best balance of speed and effectiveness. Ideal when you need to remove heavy grime (wheels, underbody) but still protect paint.
- Automatic touchless wash: Best for convenience and quick upkeep. Use for routine cleaning between hand washes or when you need speed.
Pick by priority: paint protection → hand wash; speed + grime removal → pressure-assisted; sheer convenience → touchless.
If you go with foam and a cannon, MTM Hydro paired with a Karcher K5 works really well together.
Common Mistakes
- Swirls after washing: You likely used a dirty mitt or circular motions. Switch to two-bucket + grit guard and straight-line strokes.
- Water spots after drying: You washed in sun or used hard water. Dry quickly with big microfiber towels and consider a water-spot remover.
- Foam not clinging: Check dilution rates in the foam cannon or try a different soap (Mr. Pink foams beautifully).
- Clay leaves residue? Re-wash and follow with quick detailer; clay lube helps prevent sticking.
How Often Should You Do It
- Quick rinse + foam wash: weekly (if you drive daily).
- Full decon + clay: every 3–6 months (or when paint feels rough).
- Polish: once or twice a year depending on swirl buildup.
- Wax/sealant: every 2–6 months depending on product. Collinite lasts longer.
FAQ
Q: Can I use automatic car washes on my BMW?
A: Avoid old brush/manual automatic car washes — nylon brushes can cause micro-swirls. Touchless washes are safer but don’t clean as well. Hand washing with the right method is best.
Q: Is clay necessary for a new BMW?
A: New cars can still pick up overspray and rail dust during transport. Check by touch: if the paint feels rough after washing, clay it.
Q: Which protects better: wax or ceramic coating?
A: Ceramic coatings last longer and resist contaminants, but they require perfect prep (clay + polish) and sometimes professional application. Waxes and sealants are cheaper and easier to reapply. Choose your comfort level.
The Dos and Don’ts of BMW Car Washing
Here’s a quick rundown of the do’s and don’ts you should keep in mind when washing your BMW. It’ll help you avoid any damage to the paint or finish.
Dos:
- Use a pH balanced car wash soap that is specifically formulated for use on automotive paint.
- Use a soft microfiber towel or mitt for washing and drying your BMW.
- Wash your BMW in a shaded area or during cooler parts of the day to prevent water spots.
- Use a separate bucket for rinsing your towel or mitt to avoid transferring dirt and debris back onto your BMW’s paint.
- Use a gentle touch when washing your BMW to avoid scratching the paint.
Don’ts:
- Use household cleaning products such as dish soap or laundry detergent, as these can be too harsh and can damage the paint.
- Use abrasive materials such as brushes or sponges with a rough surface, as these can scratch the paint.
- Wash your BMW in direct sunlight, as this can cause the soap to dry too quickly and leave behind water spots.
- Use a high-pressure washer or nozzle, as this can damage the paint and finish.
- Let the soap or water dry on your BMW’s paint, as this can leave behind water spots and streaks.
If you stick to these simple dos and don’ts, you can wash your BMW safely and effectively without risking any damage.
Final talk
A clean and well-protected BMW really shines — you get that deep gloss and mirror-like reflections, plus it saves you from a ton of headaches later on. Just invest a bit in some good products (check out the names I suggested earlier) and stick to this simple process: rinse, decontaminate, use the two-bucket wash method, clay if you need to, dry it off, then protect it. This way you’ll reduce swirl marks, boost that gloss, and keep your BMW’s clear coat looking great.
Check out some of our top product picks for washing your BMW right here, “Spring into Action: The Best Car Care Products for 2025.” You can explore our site for detailed car reviews, handy buying tips, and all the latest buzz in the car world. Take your time browsing, and don’t forget to bookmark our homepage for updates coming your way!
- Best Car Interior Cleaning Kits: Make Your Cabin Look New
- Which XV70 Camry Year Should You Buy? A Tested Guide

- Magnetic Phone Mounts & Mounts for Thick Cases: That Actually Work!
- Best Wireless CarPlay Adapters for Older Cars

- Best Seat Gap Fillers for Leather Seats
- The Most Underrated Cars — Hidden Gems You Should Actually Consider

*Disclaimer: This website provides automotive content for informational purposes only and should not be considered professional advice. While we strive for accuracy, we do not guarantee the reliability or suitability of any vehicle or product mentioned—always conduct your own research before making purchasing decisions. Additionally, some links on this site are affiliate links, meaning we may earn a commission if you make a purchase, at no extra cost to you.
**When you click on links we might get a small commission on purchases that qualify.